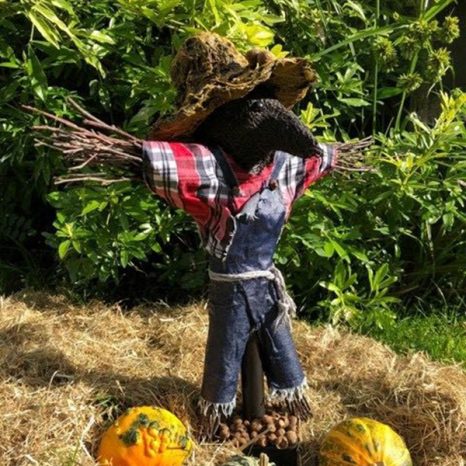
Hello, welcome to my step by step instructions to create a fabric sculpted scarecrow.
Listed below are the items I used but feel free to substitute in anything you already have in your craft stash.
Materials Used
- Wooden base from Powertex
- Powertex Universal Medium Black and Transparent
- Wooden dowel 20cm x 5cm
- Foil
- Masking tape
- Twigs
- 2 Cardboard tubes from inside of foil
- Waste fabric eg gauze
- Hessian
- 2 Plastic eyes – I used 10 mm
- Fabric of choice for clothes and hat
- Powertex Paper Decoration – any colour (optional)
- Powertex Easy Varnish
- Power Color Yellow Ochre
- Optional embellishments – I used fallen acorn husks
How to make a Scared Crow Scarecrow
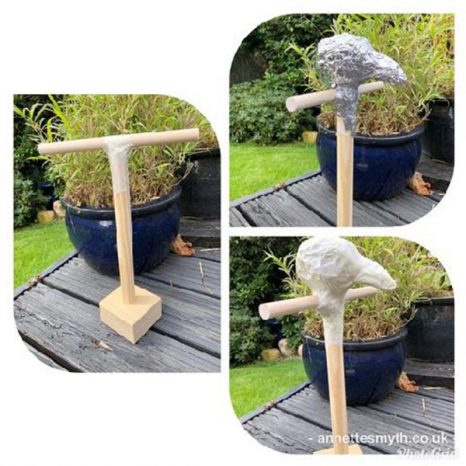
Step 1. Build the armature and head
Attach dowel to base with tape. Use foil to build head, neck and beak onto this. Cover with tape ensuring it is secure.
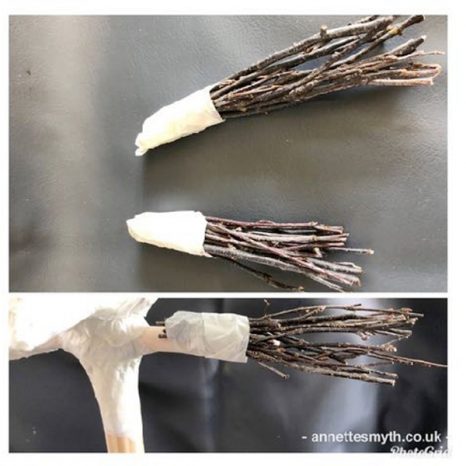
Step 2. Add the Arms
Gather a small bunch of twigs and secure with masking tape. Secure these to the ends of the dowel with more tape
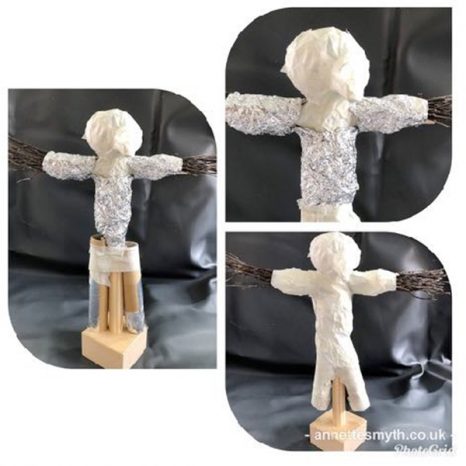
Step 3. Build the body
Using foil fill out arms. Tape cardboard rolls to wooden base, cut to required length and fill in the torso with more foil.
Cover everything with tape and coat with a layer of black Powertex.
Step 4. Add the feet
Use 2 more twig bunches, dip strips of gauze in Black Powertex and wrap around tape on the twigs then slide up the tube legs.
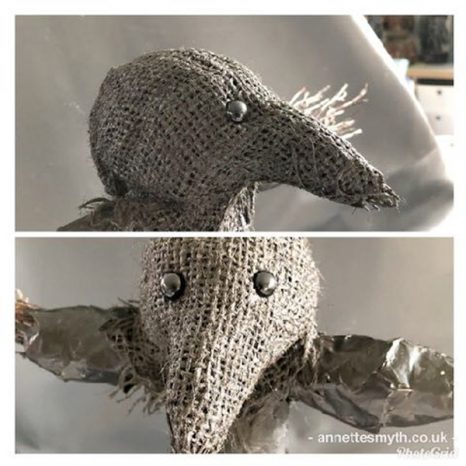
Step 5. Cover the head
Coat the hessian in Black Powertex and shape around the head and down neck. Push eyes into place.
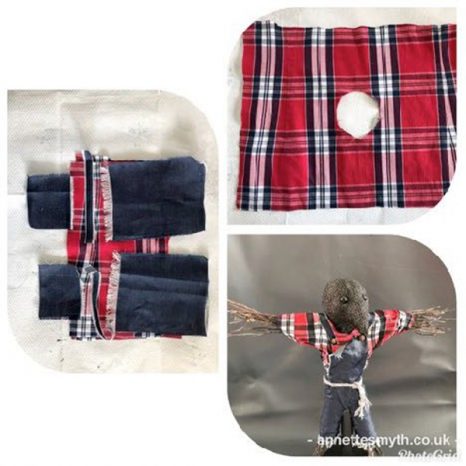
Step 6. Dress the Crow
Using Transparent Powertex I dipped the fabric as follows
• a square of fabric for the top – cut a hole in the centre to fit over the head.
• rectangles for the dungaree legs
• smaller rectangles for the dungaree bib
• strips for the shoulder straps
• a length of rope for the belt
DESIGNER TIP – You could choose your fabrics to suit your own rooms colour scheme?
Step 7. Make the Hat
The video below will show you how I made the hat. I decorated mine with Paper decoration dipped in Black Powertex.
VIDEO LINK
WHY NOT try using hessian to give a straw hat effect?
Step 8. Drybrush the hat
I used Powertex Easy Varnish and Yellow Ochre Powercolor to drybrush the hat .
Watch my video here if you’re not sure how to drybrush.
Step 9. Finishing touches
Using Transparent Powertex I added fallen acorn husks to the hat, dungarees and base.
I hope you have as much fun as I did creating your very own scared crow. There is no end to the different types of scarecrows you could make. How about a scaredog or scarecat…..What scare animal would you create?
If you would like to see more of my work or join me for a workshop, at a future date, in my home studio then please take a look at my website – www.annettesmyth.co.uk or contact me via my Facebook page.
Until next time Happy Creative Adventures Axx
